Raspberry Pi Wifi (Station + AP modes)
本文地址:http://tongxinmao.com/Article/Detail/id/346
I have posted NEW Getting started instructions here:
http://pifi.imti.co/ Getting started guide
https://github.com/cjimti/iotwifi Source code
| GO | Container Size | Container Layers | Container Pulls |
|---|---|---|---|
 |  |  |
UPDATE 2018-03-15
I wrote this post about a year ago, putting together some notes on how I got my Raspberry Pi 3 running in both Station (Wifi Client) and AP (Access Point) mode. However some changes have been made to Raspian and some of the steps are not exacly the same. I will leave this post for refrence, however if you are interested in a better solution then checkout my project IOT Wifi
THE FOLLOWING IS DEPRICATED -Refrence Only
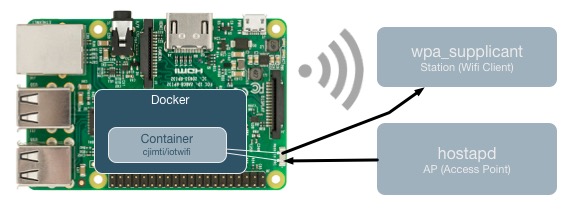
Running the Raspberry Pi 3 as a Wifi client (station) and access point (ap) from the single built-in wifi.
Overview
We will be editing the following files:
WPA configuration/etc/wpa_supplicant/wpa_supplicant.conf
Network interfaces/etc/network/interfaces
Hostapd config/etc/hostapd/hostapd.conf
Hostapd default/etc/default/hostapd
AP startup script/usr/local/bin/hostapdstart
Startup script/etc/rc.local
Station Setup
The following will configure the Pi to access a wifi network as a client (station).
Create the wpa_supplicant configuration:
sudo vi /etc/wpa_supplicant/wpa_supplicant.conf
Add and customize the following:
Network Interfaces
Edit the interfaces configuration:
sudo vi /etc/network/interfaces
The entire configuration file should look like the following:
The uap0 interface will be used later on for our Access Point (AP).
Reboot the Pi:
sudo reboot
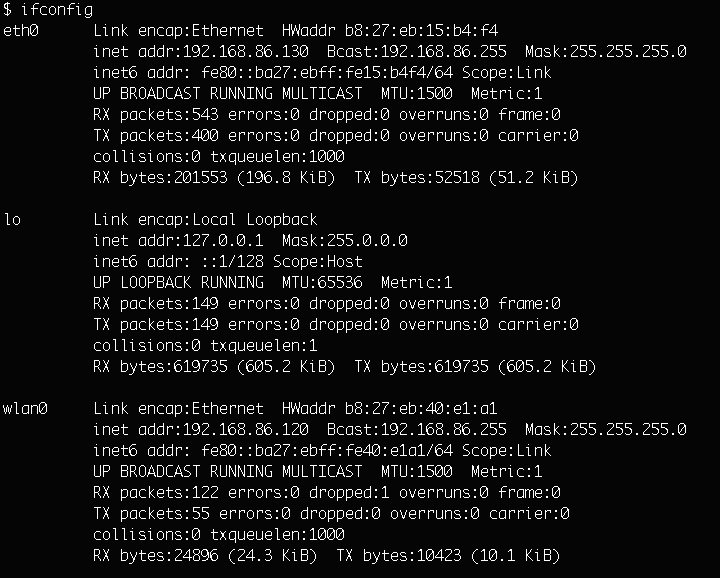
After the Pi boots up run the following command to check the status of the the wlan0 interface:
ifconfig
You should see wlan0 has received an ip address from the network it connected to:
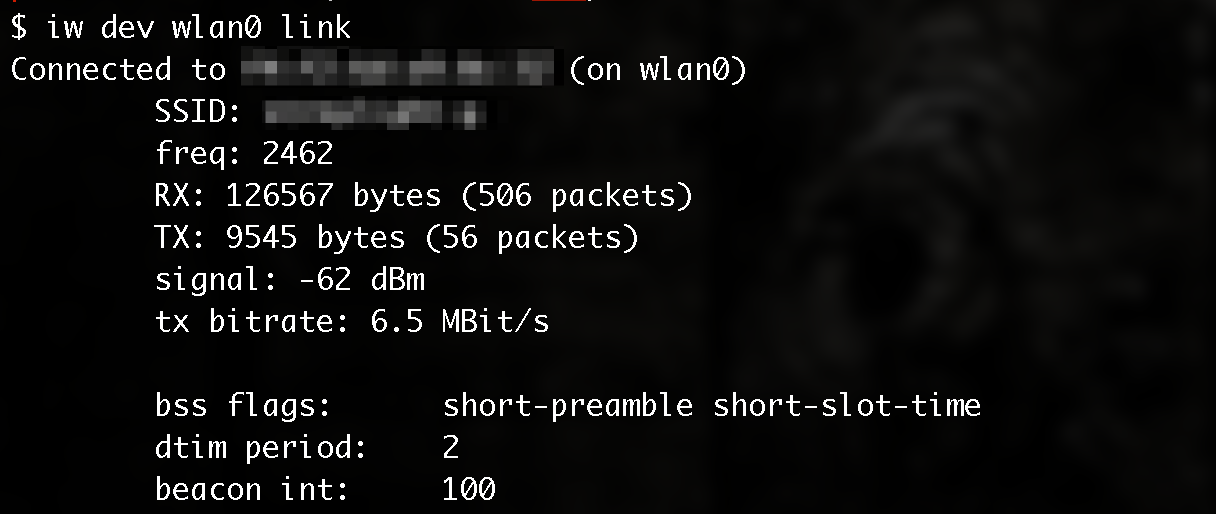
Use iw to check the wireless status of wlan0.
iw dev wlan0 link
You see the SSId of the network you are connected to like this:
AP Setup
sudo apt-get install hostapd dnsmasq
Create a new hostapd configuration:
sudo vi /etc/hostapd/hostapd.conf
The new configuration should look like this:
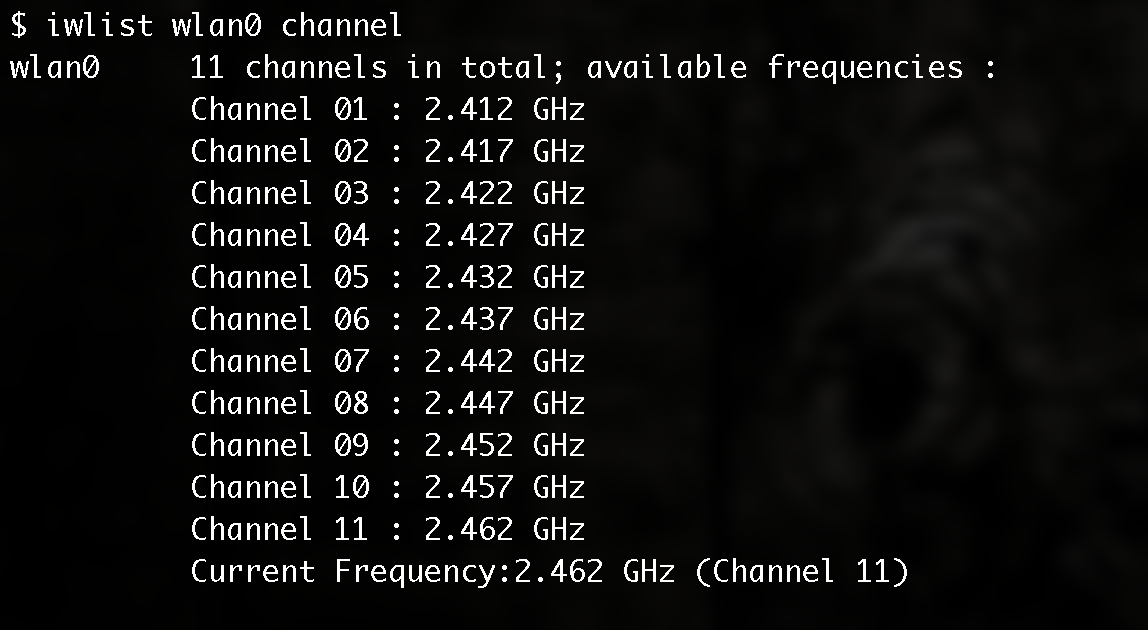
Of course you will want to customize a few things like the ssid and passphrase (wpa_passphrase). You will also want to determine the best channel by looking at the channel wlan0 is currently using.
iwlist wlan0 channel
In this example output the Pi is using Channel 11:
Next you will need to modify the hostapd default configuration to use your new configuration file:
sudo vi /etc/default/hostapd
Add the following line:
DAEMON_CONF="/etc/hostapd/hostapd.conf"
Next we need to make a script to set the interface to AP mode, start hostapd and set some iptables configuration.
sudo vi /usr/local/bin/hostapdstart
Add the following lines to this new script.
Update permissions on the new hostap start script.
chmod 775 /usr/local/bin/hostapdstart
DNS Setup
We need the new AP to hand out IP addresses to our clients. Configure dnsmasq by editing the following.
sudo vi /etc/dnsmasq.conf
The configration should look like the following.
Start dnsmasq with the following.
sudo service dnsmasq start
Starup
Edit the rc.local script to run hostapdstart on boot up.
sudo vi /etc/rc.local
Add the following line.
/bin/bash /usr/local/bin/hostapdstart
Reboot the the Pi
sudo reboot
Raspberry Pi Wifi links I have benefitted from
Thanks to the Raspberry Pi forum thread “Pi 3 as wiireless client and wireless AP?”
Adafruit’s excelent tutorial on “Setting up a Raspberry Pi as a WiFi access point”
Wifi and Networking
Check out my updated instructions to get your Raspberry Pi working in Station and AP mode at http://pifi.imti.co/ and the Github project athttps://github.com/cjimti/iotwifi
上一篇:sp-pos88 网口串口USB3合1 USB描述符
下一篇:Catching wifi probes using a Raspberry Pi