Catching wifi probes using a Raspberry Pi
本文地址:http://tongxinmao.com/Article/Detail/id/347
Catching wifi probes using a Raspberry Pi
By January 2, 2018
Interested to know which wifi devices are around? Use a Raspberry Pi to detect devices even if these are not connected to any wifi access point……
Introduction
Most Wifi devices (like mobile phones) broadcast so called wifi probes once turned on. They do so in order to determine if a specific wifi accesspoint is available or to determine which access points are around. Access points respond to these probes by providing information required to setup a connection between the device and the access point. The client probes contain the globally unique mac address of the device. Furthermore the probes can be used to obtain an indication of the distance of the device from an access point. Finally the mac address can be used to determine the type of device at stake.
This valuable information can be used for rather doubtful applications like tracking people (without their approval) and hacking. As a result, wifi probing does have a somewhat doubtful reputation. Nevertheless there are lots of applications of probes that are useful and that do not necessarily violate people's privacy.
For example: you can use it to determine how busy a train coach is at any point in time. Useful information for the railway company in order to properly distribute material. Also useful for travelers to find a less crowded coach during rush hour.
The wifi probes can also be used to warn travelers at an airport when it is time to move to the gate based on their actual location on the airport. This information can also be of use to determine if the luggage of a passenger who is late must be unloaded (while he or she is at the opposite side of the airport and is not showing any signs of moving to the gate).
This document contains a description on who to 'catch' wifi probes using very simple means.
Warning: In some countries or territories gathering and/or storing mac addresses (without the approval of the owners of devices) is forbidden or is only allowed under specific circumstances. Please consult the applicable law in the county or territory where you reside before implementing a wifi probe detector!! The information in this document can not and should not be used as an encouragement or excuse to break any applicable law. |
Requirements
In order to build a wifi probe catcher the following is required:
1) A Raspberry Pi. I used a Raspberry 2 model B. I guess that any Raspberry with an USB port will work, including newer model 3. I used the standard Raspbian as the OS.
2) A wifi adapter that support monitoring (promiscuous mode). This is the most tricky part…. you need an adapter that:
a) Supports promiscuous (or monitoring) mode. Please mind: most adapters don't support this.
b) Has a driver in Raspbian
c) The driver supports promiscuous (or monitoring) mode.
The trouble here is that chip sets and drivers seem to change constantly. Therefore it is hard to say which adapter works…. It seems the Alfa AWUSO36NH. According to this web page is meets all the requirements. It is available for under 20 euro in China and Europe.

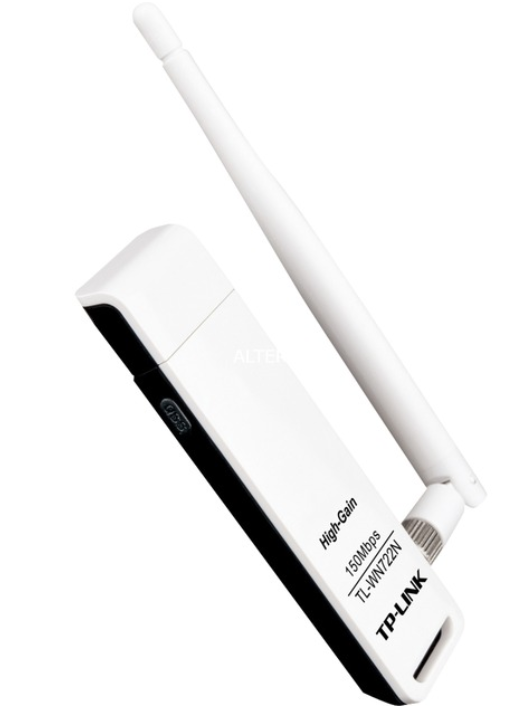
I used the TP-Link TL-WN722N Adapter. This adapter alos works out of the box on Raspbian and is even cheaper (about 12 euro). NEVERTHELESS: according to some reports the new generation (v2 and v2.1) of this adaptor doesn't support the monitor mode any more!!!
It is required to enable networking in the Raspberry aas well. Make sure you use a alternative wifi or Ethernet adapter for this (not the usb adapter to be used to catch wifi probes).
Installation and configuration steps
Step 1) Install Raspbian on a microSD card as per these instructiions, boot the PI and configure networking, enable SSH (and potentially VNC) as per these instructions.
Step 2) Plugin the wireless adapter that you intend to use for monitoring (in my case the TP-LINK) in one of the USB ports of the Raspberry pi and reboot de pi. When the Raspberry boots and if you use the TP-Link adapter, the green led on the front of the adapter will start blinking.
Step 3) Find out the wlan number of the adapter that you are going to use to do the monitoring.
In linux wifi adapters are named wlan<x>. Normally <x> starts with 0. If nevertheless there are multiple adapters in a machine, you will also find wlan1, wlan2 etc. In this step we need to find out the number of the adapter that we will be using to do the monitoring.
a) First check if the adapter is recognized. Open a terminal on the Raspberry and run the command 'lsusb'. The newly added wireless adapter that you intend to use for monitoring must be listed. While I use a TP-LINK adapter, I found the 'Ralink Technology RT5370 adapter' in the output.

b) Find the wlan number. Run ifconfig and look for the wlan adapters. There are probably multiple wlan adapters:
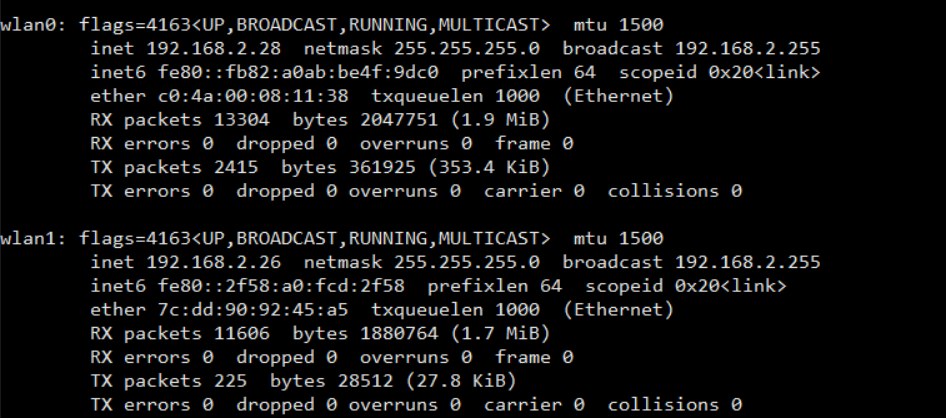
If you are not sure which wlan port is to be used as the monitoring adapter, bring one down (sudo ifconfig wlan<x> down). If the led of your usb wifi adapter goes down, you have the right one.
Note the number of monitoring adapter. In the remaining part of this text, this number is referred to as the <wlan number>
Step 3) airmon-ng is used to put the adapter in the monitoring mode. Install airmon-ng with the command 'sudo apt-get install airmon-ng'.
Step 4) Set the adapter in the monitoring mode.
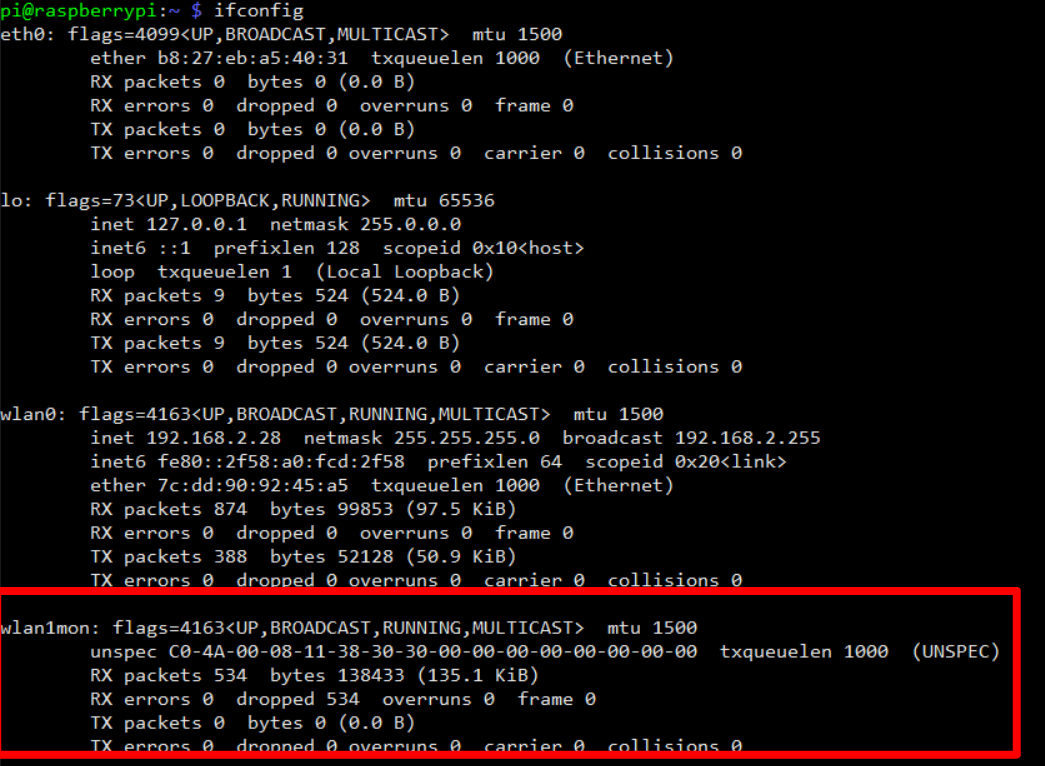
a) Run the command 'sudo airmon-ng start wlan<wlan number>'
b) Run the command 'ifconfig', you will find a newly created virtual adapter for monitoring named wlan<wlan number>mon:
Step 5) Install the required Python libraries
In order to catch wifi probes we need to install the Python libraries netaddr and scapy. Use the following steps to download and install these:
a) Open or reuse a terminal window.
b) Create a directory python in your home directory, run the commands:
cd ~
mkdir python
cd python
c) Download and install netaddr by running the following commands:
git clone https://github.com/drkjam/netaddr
cd netaddr
sudo python setup.py install
cd ..
d) Download and install scapy by running the following commands:
git clone https://github.com/secdev/scapy.git
cd scapy
sudo python setup.py install
Step 5) Install probemon. This Python application runs a probe monitor and logs the results in a file.
a) Go to ~/python (run cd ~/python)
b) git clone https://github.com/nikharris0/probemon.git
c) Go to the directory ~/python/probemon (cd probemon)
Step 6) Test
a) Run the command 'sudo python probemon.py -i wlan<wlan number>mon -f -s -r -l'.
Please mind: it may take up to a minute before output becomes visible.
Troubleshooting
If you encounter the error: 'type object "'datetime.datetime' has no attribute 'datetime'", please edit the file probemon.py (in ~/python/probemon) and change line 36 from
log_time = datetime.datetime.now().isoformat() |
into
log_time = datetime.now().isoformat() |
If the RSSI (signal strength) is not properly set (remains -256 for all entries), please edit the file probemon.py (in ~/python/probemon) and change line 56 from
rssi_val = -(256-ord(packet.notdecoded[-4:-3])) |
into
rssi_val = -(256-ord(packet.notdecoded[-2:-1])) |
It seems the rssi information is located in different places depending on the type of headers supported by the adapter.
Resources:
Log Wi-Fi Probe Requests from Smartphones & Laptops with Probemon: https://null-byte.wonderhowto.com/how-to/log-wi-fi-probe-requests-from-smartphones-laptops-with-probemon-0176303/
Everything generates data: Capturing WIFI anonymous traffic using Raspberry Pi and WSO2 BAM: https://holisticsecurity.io/2016/02/02/everything-generates-data-capturing-wifi-anonymous-traffic-raspberrypi-wso2-part-i/
Configure the Raspberry Pi in monitoring mode: https://holisticsecurity.io/2016/02/02/everything-generates-data-capturing-wifi-anonymous-traffic-raspberrypi-wso2-part-i/
Not displaying RSSI: https://superuser.com/questions/915250/tcpdump-not-displaying-rssi
上一篇:Raspberry Pi Wifi (Station + AP modes)
下一篇:设置树莓派WIFI为监听模式